
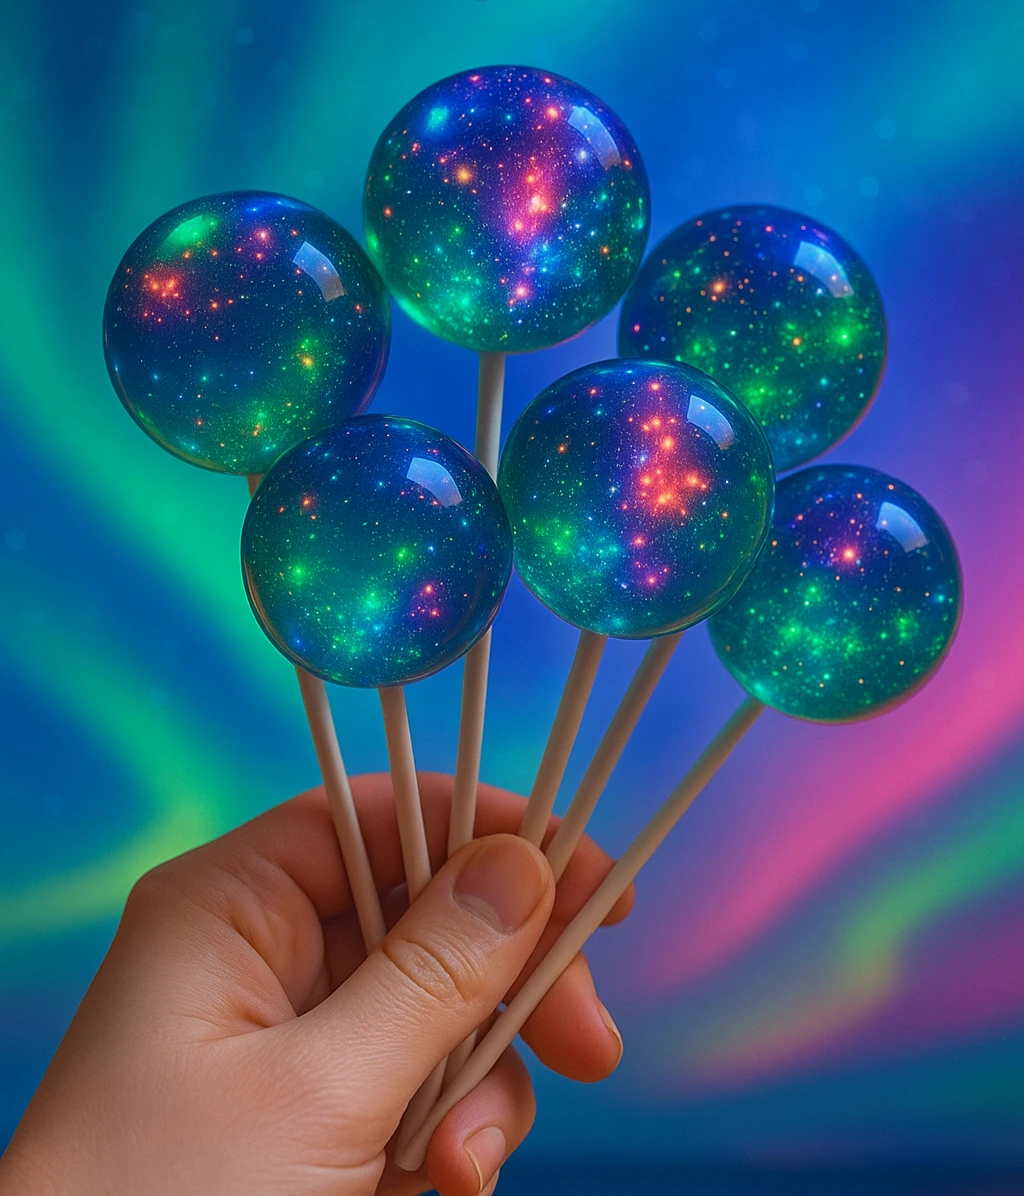
There’s something magical about the Northern Lights—those streaks of neon blues, purples, and greens dancing across the sky. Imagine capturing that beauty in a sweet treat you can actually eat. That’s exactly what this recipe does. These “Northern Lights Candy Glow” lollipops aren’t just fun to make, they’re little works of art you can hold in your hand.
I remember the first time I tried a galaxy-style candy recipe; I thought I’d make a complete mess. But once I leaned into the swirling colors and glitter, the imperfections actually made them look even more like the real sky. So don’t worry about perfection—embrace the glow.
Ingredients You’ll Need
2 cups granulated sugar
2/3 cup pure corn syrup (100% corn)
3/4 cup water
1/2 teaspoon vanilla or cotton candy flavoring (alcohol-free, powdered or oil-based)
Neon gel food colors (blue, green, purple, pink)
Edible glitter or luster dust (food-safe only)
Lollipop sticks
Candy thermometer
Practical tip: If you’ve never worked with candy before, a thermometer is non-negotiable. Eyeballing the “hard crack” stage almost never ends well. Invest in a simple candy thermometer—you’ll use it more than you think.
Step 1: Preparing the Molds
Start by lightly greasing your lollipop molds or lining a baking sheet with parchment paper if you want free-form shapes. Set the lollipop sticks in place so they’re ready to go.
Personal touch: I once skipped prepping before cooking the sugar, and by the time I scrambled to set up the molds, the candy had hardened. Lesson learned—always be one step ahead with candy making.
Step 2: Cooking the Sugar Mixture
In a saucepan, combine sugar, corn syrup, and water. Stir gently over medium heat until the sugar dissolves completely. Once it looks clear, stop stirring. Insert your candy thermometer and let it boil away until it reaches 300°F (150°C). This is known as the “hard crack” stage, which is what makes the candy snap instead of bend.
Tip to remember: Don’t stir once it starts boiling. Stirring can cause unwanted crystals, leaving you with cloudy candy instead of glassy gems.
Step 3: Adding Flavor
Once your mixture hits that magic number, remove the pan from the heat and quickly stir in your chosen flavoring. Vanilla gives a comforting sweetness, while cotton candy makes it feel playful and whimsical.
Step 4: Creating the Galaxy Colors
Here’s the fun part. Divide the hot candy into separate heatproof bowls and add drops of your neon food coloring. Gently swirl the colors together—don’t fully mix them. The beauty comes from the marbled streaks, just like the sky at night.
Little trick: Less is more. If you swirl too much, you’ll lose the galaxy effect and end up with one solid color.
Step 5: Forming the Lollipops
Carefully pour the colorful mixtures into your prepared molds. While the candy is still warm and glossy, sprinkle edible glitter or luster dust over the tops. This step is what gives them that shimmering aurora look.
Step 6: Cooling and Enjoying
Let the lollipops cool completely at room temperature. Once set, pop them out of the molds and admire your handiwork. Store them in airtight bags to keep them shiny and fresh until you’re ready to show them off (or eat them all yourself).
Final Thoughts
These Northern Lights Candy Glow lollipops are more than just candy—they’re conversation starters, party showpieces, and a little reminder of how much fun it can be to play with color in the kitchen. Whether you’re making them for a themed birthday party, holiday treats, or just because you wanted a taste of magic, they’re bound to leave everyone smiling.
And if a batch doesn’t come out exactly the way you imagined? Don’t sweat it. The sky never looks the same twice either.