
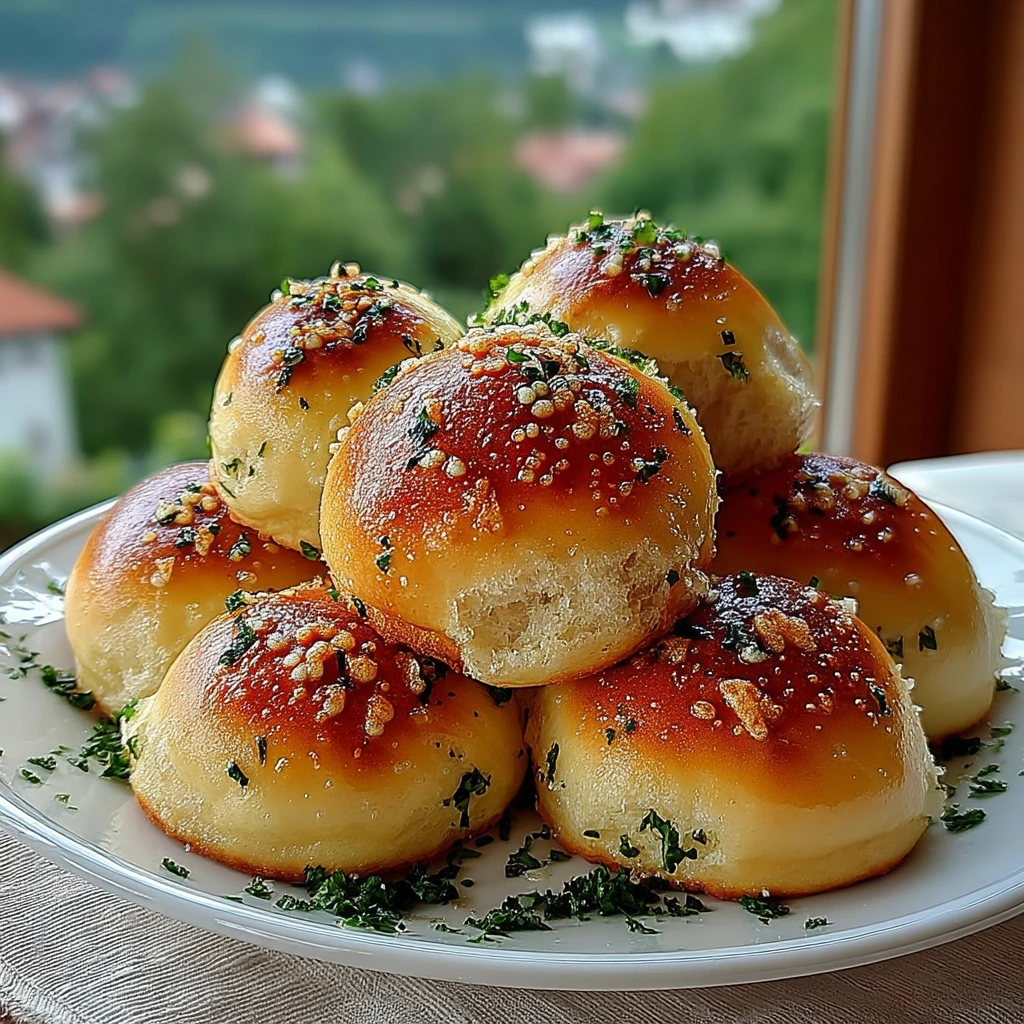
There’s something universally comforting about the smell of freshly baked bread — especially when that bread is infused with butter, garlic, and herbs. These Garlic Bread Rolls are soft, golden, and fragrant, the kind of bake that instantly fills your kitchen with warmth and makes everyone ask, “What’s in the oven?”
I first made these rolls for a Sunday family dinner when I wanted something more special than plain bread. The result? Buttery, pull-apart rolls with a perfectly garlicky aroma and a hint of parsley that tasted like they came straight from a bakery. Ever since then, they’ve become a family favorite — especially alongside soups, pasta, or even just with butter straight out of the oven.
Why You’ll Love This Recipe
If you’ve ever bought garlic rolls from a bakery and wondered how to recreate them at home, this recipe is your answer. The rolls are soft inside, golden on the outside, and brushed with a buttery garlic-parsley topping that makes them utterly irresistible.
Here’s why they’re worth making:
- Simple pantry ingredients — nothing fancy, just real food.
- Perfect texture: soft and fluffy with just the right chew.
- That unmistakable garlic-butter aroma that feels like comfort itself.
- Freezer-friendly and great for meal prep or gatherings.
Personal Tip: I love baking these when friends come over because they make the whole house smell amazing. I always bake an extra batch — they disappear faster than you’d expect!
Ingredients
- 3 cups all-purpose flour
- 1 tablespoon sugar
- 1 packet (2¼ teaspoons) active dry yeast
- 1 teaspoon salt
- 1 cup warm milk
- 2 tablespoons unsalted butter, melted (for dough)
- 2 tablespoons olive oil
- 4 cloves garlic, minced
- 2 tablespoons fresh parsley, chopped
- ¼ cup grated Parmesan cheese (optional)
- 2 tablespoons unsalted butter, melted (for brushing)
These ingredients are simple, but the combination creates magic. The milk makes the dough rich and tender, while olive oil and butter add flavor and softness. The garlic and parsley give it that irresistible savory touch.
Tip: Use fresh garlic and parsley instead of dried — it makes a huge difference in both taste and aroma.
Step-by-Step Instructions
- Activate the yeast:
In a large bowl, combine warm milk and sugar. Sprinkle yeast on top and let it sit for 5–10 minutes until foamy. This step helps ensure your rolls will rise beautifully. If the yeast doesn’t foam, the milk might be too hot or your yeast may be expired — start over with fresh yeast for best results. - Make the dough:
Add flour, salt, and melted butter to the yeast mixture. Mix until it comes together, then knead for about 8–10 minutes (by hand or with a dough hook) until smooth and elastic. Advice: Don’t rush the kneading — it’s what gives the rolls their signature soft and chewy texture. The dough should feel slightly tacky but not sticky. - First rise:
Transfer the dough to a greased bowl, cover it with a damp cloth or plastic wrap, and let it rise in a warm spot until doubled in size (about 1 hour). Personal Note: I like to tuck the bowl inside my turned-off oven with the light on — it creates the perfect cozy environment for rising, especially in colder months. - Prepare the garlic butter mixture:
In a small bowl, mix olive oil, minced garlic, and chopped parsley. This will be brushed over the rolls before and after baking for that signature flavor. - Shape the rolls:
Once the dough has risen, punch it down gently to release the air. Divide it into 12 equal pieces, roll each one into a ball, and place them in a greased baking dish, leaving a little space between them. Tip: For even rolls, weigh your dough on a kitchen scale before dividing — it ensures they bake evenly. - Brush and top:
Brush each roll generously with the garlic butter mixture. If you want extra flavor, sprinkle Parmesan cheese on top — it creates a beautiful golden crust. - Second rise:
Cover the pan again and let the rolls rise for another 25–30 minutes until puffy. This second rise is key for achieving that airy, fluffy texture. - Bake:
Preheat your oven to 350°F (175°C) and bake the rolls for 20–25 minutes, or until they’re golden brown on top and sound hollow when tapped. - Finish with butter:
As soon as they come out of the oven, brush them with melted butter (you can even add a bit more garlic if you’re a fan like me). Let them rest for a few minutes before serving. Experience Tip: I once brushed them with garlic butter mid-bake, and the result was extra glossy rolls with an even deeper flavor. Try it if you want that bakery shine!
Serving Suggestions
Garlic Bread Rolls are the perfect side for almost anything. Serve them warm with:
- Pasta dishes like spaghetti, lasagna, or creamy Alfredo.
- Soups and stews, especially tomato, mushroom, or chicken soups.
- Salads, for a lighter, balanced meal.
- Or simply on their own — warm, buttery, and straight from the oven.
They also make amazing mini sandwiches — slice them open and fill with cheese, roasted veggies, or pulled chicken for a quick bite.
Tip: If you’re serving them for a dinner party, bake them in a round dish so they pull apart beautifully at the table — it always impresses guests.
Storage and Reheating
Store leftover rolls in an airtight container or wrapped in foil for up to 2 days at room temperature. To reheat, warm them in the oven at 300°F (150°C) for 5–7 minutes — they’ll taste freshly baked again.
For longer storage, freeze the rolls after baking and cooling. Just thaw and reheat before serving.
Tip: You can also freeze the shaped dough balls before baking. When ready to use, let them thaw and rise, then bake as usual. It’s a great time-saver for holidays or busy weeks.
Personal Reflections
Every time I make these rolls, I’m reminded how rewarding baking can be. There’s a rhythm to it — the quiet waiting as the dough rises, the satisfaction of brushing on that fragrant garlic butter, and finally, the golden payoff when they emerge from the oven.
The first time I served these, my family couldn’t wait for them to cool — everyone grabbed one straight from the pan. The smell alone was enough to pull everyone into the kitchen. Since then, these rolls have become part of our holiday and weekend traditions — a small but delicious reminder of how simple ingredients can bring people together.
And honestly, that’s what I love most about baking: it’s not just about food, it’s about moments.
Final Thoughts
Garlic Bread Rolls are the ultimate comfort bake — soft, buttery, and full of flavor. They take a little patience, but the process is so worth it. Once you make them from scratch, you’ll never look at store-bought rolls the same way again.
Whether you’re making them for a family dinner, a cozy night in, or a festive gathering, these rolls always deliver. They’re the kind of recipe that feels special yet familiar — warm, homemade, and impossible to resist.