
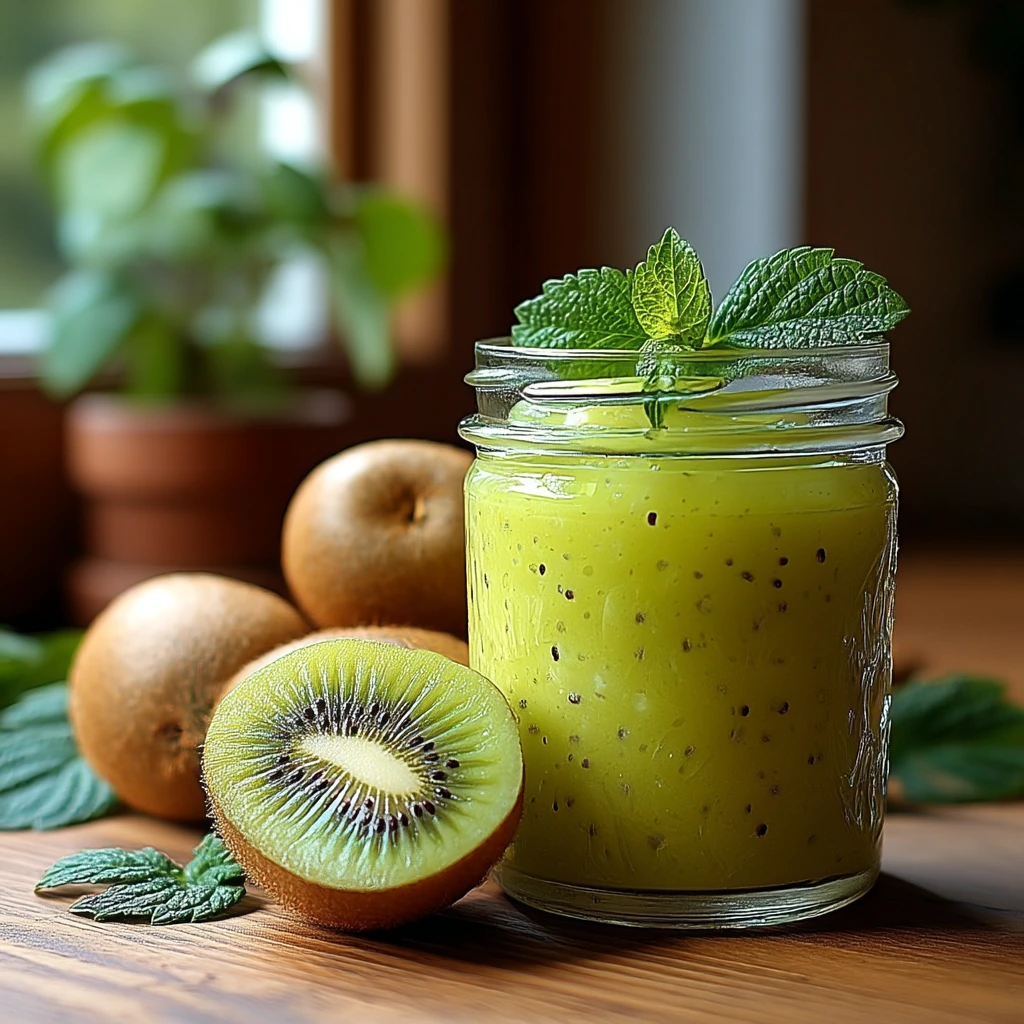
If you’ve never tried kiwi curd before, get ready for a bright and tangy surprise. It’s smooth, creamy, and bursting with tropical flavor — the kind of treat that instantly wakes up your taste buds. I first made this on a whim after finding a basket of ripe kiwis that were just too beautiful to ignore. The result? A stunningly green, luscious curd that felt like a jar of edible sunshine.
This recipe quickly became one of my favorite “secret weapons” in the kitchen. It’s simple enough for everyday breakfasts but elegant enough to use as a filling for desserts and pastries. Think of it as lemon curd’s more exotic cousin — equally silky, but with a playful, fruity twist that makes everything taste a little more special.
Why You’ll Love This Recipe
Kiwi curd is the perfect balance of sweet and tart. The natural acidity of kiwi gives it that gentle tang, while the sugar and butter round it out with creaminess. It’s a refreshing alternative to traditional citrus curds and brings a tropical flair that feels light, fresh, and modern.
You’ll love this recipe because:
- It’s quick and easy — ready in under 20 minutes.
- It uses simple ingredients but delivers big flavor.
- It looks absolutely stunning — a gorgeous green curd that brightens any dessert table.
- It’s incredibly versatile: you can spread it, swirl it, or spoon it into almost anything.
Personal Tip: I love keeping a jar of kiwi curd in the fridge for quick desserts. A spoonful on Greek yogurt or pancakes instantly makes an ordinary morning feel like brunch at a fancy café.
Ingredients
- 4 ripe kiwis
- ¾ cup granulated sugar
- 3 large egg yolks
- 1 large egg
- ¾ teaspoon citric acid (or lemon juice if preferred)
- 6 tablespoons salted butter, chilled and cut into pieces
- Green food coloring (optional)
Ingredient Insights
- Kiwis: Choose ripe kiwis that yield slightly to pressure — they’ll blend smoothly and add natural sweetness. If they’re underripe, your curd will turn out too tart.
- Citric Acid: It enhances the tangy flavor and helps preserve that beautiful color. You can substitute it with fresh lemon juice for a softer acidity.
- Butter: Use salted butter to balance the tartness. The butter also gives the curd its signature glossy, custard-like texture.
- Green Food Coloring: Totally optional, but it makes your curd pop with a vibrant green hue — perfect for presentation.
Step-by-Step Instructions
- Prepare the Kiwis:
Peel and chop the kiwis into small chunks. Blend them in a food processor or blender until completely smooth. You should get about 1 cup of puree.
Tip: If you want a smoother texture, you can strain the puree to remove the tiny black seeds, though I personally like leaving a few for that natural kiwi look. - Whisk the Base:
In a medium saucepan (off the heat), whisk together the egg yolks, whole egg, and sugar until the mixture looks pale and slightly thickened. This step helps ensure your curd cooks evenly later without curdling. - Combine and Cook:
Add the kiwi puree and citric acid (or lemon juice) into the saucepan. Place over medium heat and whisk continuously as it warms. The mixture will start to thicken — patience is key here. Advice: Stir constantly and don’t let it boil. You’ll know it’s ready when it coats the back of a spoon and leaves a clean line when you run your finger through it. - Add the Butter:
Remove the pan from heat and add the butter pieces one at a time, whisking until each piece melts completely. The butter gives the curd that silky, rich finish. - Color and Chill:
If you’d like a more vivid green, stir in a drop or two of food coloring. Pour the curd into a clean glass jar and let it cool to room temperature before refrigerating. Once chilled, it will thicken beautifully. Personal Note: The first time I made kiwi curd, I skipped the food coloring — the natural green was subtle but lovely. If you’re serving it for guests or layering it in desserts, a tiny bit of coloring does make it pop.
How to Use Kiwi Curd
This curd is endlessly versatile — here are a few of my favorite ways to use it:
- Spread it on toast, scones, or croissants for a bright, fruity breakfast.
- Layer it in cakes, tarts, or trifles for a stunning color contrast.
- Swirl it into cheesecake batter or yogurt for a tropical twist.
- Use it as a filling for crepes or as a topping for pancakes and waffles.
For a simple dessert, I often spoon kiwi curd over vanilla ice cream and crumble a cookie or two on top. It tastes like summer in a bowl.
Storage Tips
Store your kiwi curd in a sterilized glass jar in the refrigerator for up to 10 days. If you want to keep it longer, you can freeze it for up to three months — just thaw it in the fridge overnight before using.
Tip: Always use a clean spoon when scooping curd from the jar. Any moisture or crumbs can shorten its shelf life.
Personal Experience
Making this curd taught me one of my favorite lessons in cooking — sometimes the best flavors come from curiosity. I remember staring at those overripe kiwis on my counter, thinking they were headed for the compost. Instead, I turned them into something beautiful and bright.
The moment I tasted it, I realized how much potential simple ingredients have when you experiment a little. That’s the joy of homemade food — it invites creativity, not perfection. Every time I make this now, I’m reminded that cooking is supposed to be playful, forgiving, and fun.
Final Thoughts
Kiwi curd might not be the most common recipe, but once you try it, you’ll wonder why it isn’t. It’s vibrant, refreshing, and brings a burst of color and flavor to everything it touches. Whether you’re baking, brunching, or just in need of a spoonful of sunshine, this recipe delivers.
So the next time you spot ripe kiwis at the market, grab a few extra — because once you make this, you’ll definitely want to keep a jar in your fridge.